Opening InRoads Design Files with ProjectWise Integration

If ProjectWise detects that a session of InRoads is running with a session of MicroStation (that is integrated with ProjectWise), then InRoads will also be integrated with ProjectWise.

There are three ways to open an InRoads design file with ProjectWise integration:

1.) Starting InRoads through ProjectWise Explorer

rick0

InRoads can be started directly from the ProjectWise Explorer by double clicking an associated InRoads design file (dtm, alg, tml, etc). To enable this functionality, the user must first enable legacy integration by selecting Tools>Associations>Programs from the ProjectWise Explorer menu. The user must also set the application to be the InRoads program under the General tab in the File Properties dialogue box. This is achieved by right clicking a design file in the ProjectWise Explorer which opens the properties dialogue box.
rick1

2.)   Starting InRoads using MDL Load in MicroStation

 As discussed in the previous section, MicroStation can also be started by double clicking a DGN file that has MicroStation as its association.  Once MicroStation has started, the user can use the mdl load command at the MicroStation key-in to start InRoads.  The InRoads program will detect that MicroStation is integrated with ProjectWise, and will also be integrated.

3.)   Launching InRoads from the desktop

 A user may also launch InRoads from the desktop by going to the Start Menu>All Programs>Bentley>InRoads Group XM>InRoads.  The user will see the MicroStation XM splash screen and be prompted to login to ProjectWise. 

rick2

The MicroStation Manager will then be displayed, asking the user to select a DGN file.  Once the user selects a DGN file, InRoads is automatically launched with MicroStation.  And since ProjectWise detects the integration of MicroStation, it also integrates InRoads.

rick3

InRoads XM Project Files – Integration with ProjectWise

Saving an ALG file in a ProjectWise directory:

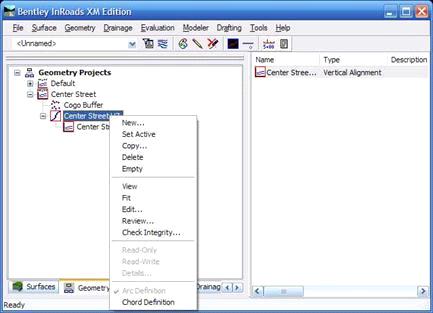
Lets first start by creating a new horizontal alignment. Call it HZ Alignment 1.alg.

inroads1


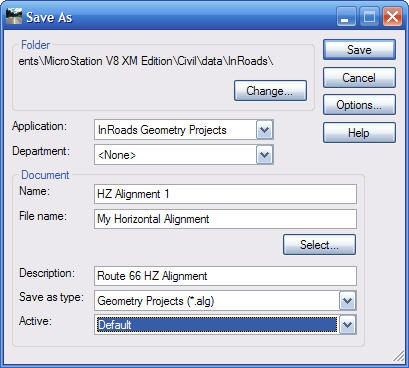
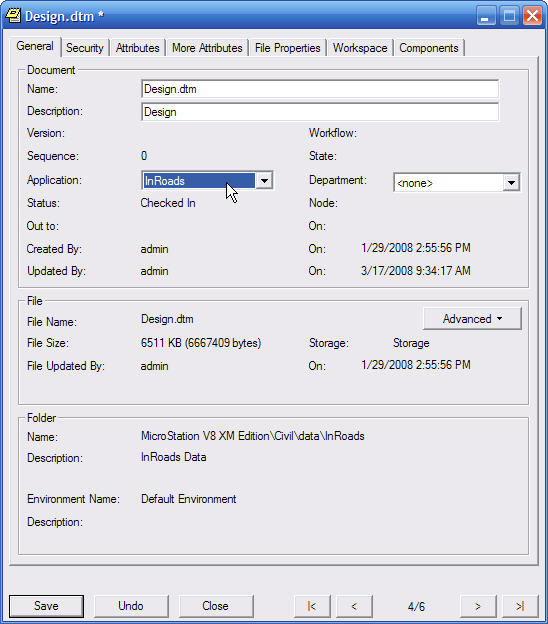
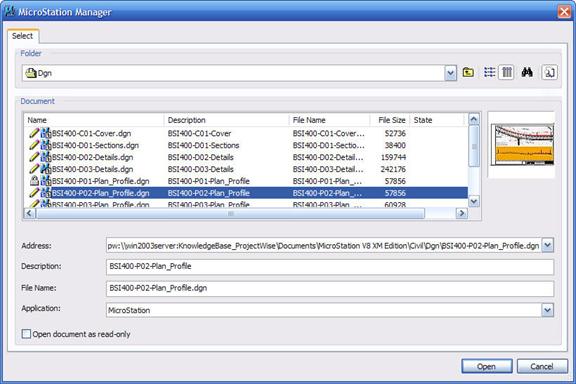
3.  Fill in the required information, such as document name, file name, and description.

4.  Select Change… to open the ProjectWise folder environment and select the desired location for the alignment file to be saved.

inroads2


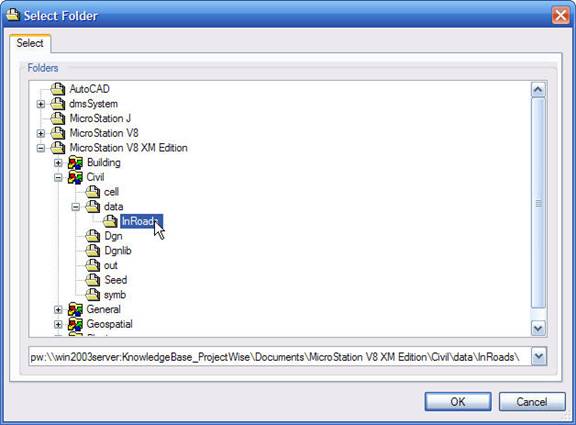
5.        Click OK and then Save to save the file.

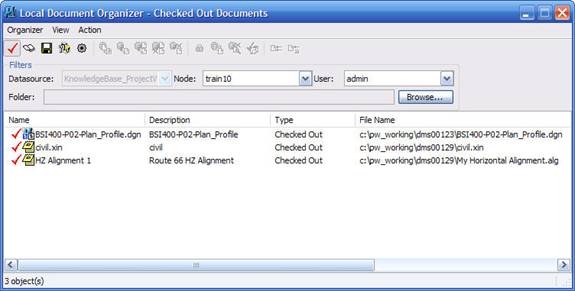
6.  The ProjectWise Organizer (File>ProjectWise Organizer) displays the files that are currently in use and their current status.  The check mark to the left of the file name indicates the files that are checked out and temporarily saved on your local machine for modification.  Note that there are 3 documents checked out locally.

§         DGN File – this file is the current opened DGN.

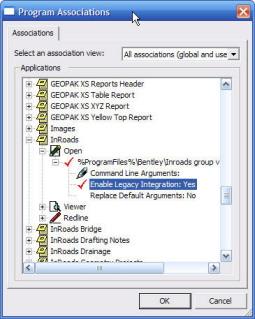
§         Civil.XIN – This preference file is set up in the project defaults to automatically open when InRoads is opened.

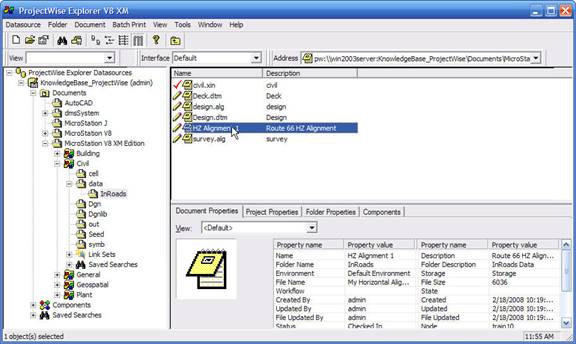
§         HZ Alignment 1 – this is the horizontal alignment file that was just saved and is still currently open within InRoads.

inroads3


These files will be in use until the designer is ready to check the files back in.  Checking in the file saves all progress and moves the file back to the server in the specified ProjectWise directory. 

To close a file and check it back in to ProjectWise:

  1. Select the file to be checked in.  For this example, let’s close the horizontal geometry and check it back in to ProjectWise.
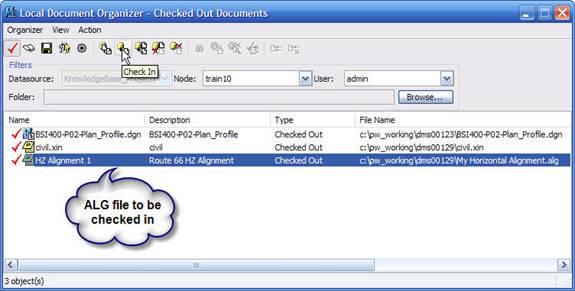
  2. When you choose File > Close > Geometry Projects, the Local Document Organizer opens to show which geometry files are currently checked out.

  3. Select the HZ Alignment 1 and select the Check in button near the top of the window as shown below.  This moves the temporary local copy back to the ProjectWise server in its previously specified location.
inroads4

Note:  When InRoads is shut down, the Local Document Organizer will automatically open.  Any opened InRoads files will need to be checked back in before closing the program.

You can view the checked in files in the ProjectWise Directory Tree.  Notice that the Civil.ini preference file is still checked out.

inroads5


Creating Custom Toolbars in InRoads XM 8.9

InRoads XM allows users to create customized toolbars with common commands for easy access. To Create a Custom Toolbar:

1)  In the main pulldown menu select Tools > Customize. The Customize dialoge box appears. (Note: You can also right click on the menu bar and select Customize to open the dialogue box)

image0


2)  With the Toolbars tab selected, click New…

3)  Type “my menu” in the Toolbar Name data field and click OK

image1

4)   The new toolbar will be created and will also appear in the Toolbars selection field.

image2

5)  Now select the Commands tab.  From the Categories pane on the left choose the pulldown menu item that contains the command that you would like to add to your custom menu.  When you select the pulldown menu item in the Categories list (left pane), the associated commands appear (right pane).  The desired command can be dragged from the list and dropped on to the customized tool bar created in step 3.

image3


6)  As commands are dragged and dropped, the customized toolbar will expand.  This toolbar can now be docked within the main menu or allowed to float within the Microstation workspace.

image4


InRoads XM 8.9 Workspace Bar shortcuts

InRoads XM makes it quicker and easier for users to access common information via a pop-up menu within the Workspace Bar. This menu provides various shortcuts to commonly used commands and will vary depending on which data category the user has selected. Integrating these shortcuts into a design workflow should help increase user speed and productivity.

Example:  Shortcut to editing a horizontal alignment


1)  Select the Geometry Tab at the bottom of the Workspace Bar.

2)  Select an opened, defined horizontal alignment and right-click it.  You will see the shortcut pop-up menu appear.

imageinroads1


3)  Choose Edit… and the Define Horizontal Curve Set dialogue box will appear.

4)  From here, you can edit the horizontal alignment as needed.

imageinroads2


Publish modules to the "offcanvs" position.