ProjectWise Messaging Agents -Change State Notifications
Last month we discussed the methods for changing the State of multiple documents within ProjectWise. It was mentioned that, if enabled, ProjectWise would send a message notifying users that a document has changed State. ProjectWise Messaging Agents are a very useful tool when there are multiple users involved in a Project that requires the tracking of multiple documents through a workflow. ProjectWise Messaging Agents also help to streamline the communication process between users and Project Managers that are in charge of approving documents.
In order to create ProjectWise Messaging Agents, users must be a ProjectWise Administrator and have access to the ProjectWise Administrator application.
1) Within the ProjectWise Administrator, navigate to the Messaging Service icon in the Console Tree and right-click in the blank area.
2) From the options that display, select New > Messaging Agent.
3) The Welcome to the New Messaging Agent Wizard will now display, click Next.
4) Within the Defining the Messaging Agent dialog box, you will see two key-in fields, Message Subject and Message Text. Key-in in State Change as the Message Subject and key-in This document has changed state within the Message Text field.
5) You will also see a pull-down menu to select the Message Type, select Email. This option will send an email via Outlook. The ProjectWise Message option utilizes the ProjectWise internal messaging system which can often be overlooked.
6) You will now be given the option to Attach Document. It is recommended to not attach a file so that the email is not too large in size.
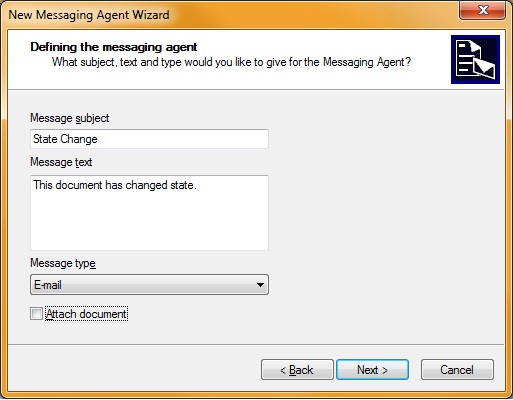
Figure 1
7) Within the Specifying Message Recipients dialog box, you can select who will receive the notification. You can select either individual users or groups. Be sure that all of the selected recipients have an associated email address in their User profile.
8) Within the Specifying Message Sending Mode, you will be able to select the option of sending the message silently or showing the dialog box before sending the message. It is recommended to select the option to show a dialog to send the message.
9) Within the Specifying Command Type and Sending Time dialog box, you will see a pull-down menu for the Command Type, select Document State Change. You will have the option to send the message when the document leaves the current state or when the document enters the new state.
10) Within the Attaching Workflow State to Workflow Agent dialog box, you will be able to select which workflow will utilize the Messaging Agent.
11) You can now click next and Finish to complete the Messaging Agent setup.
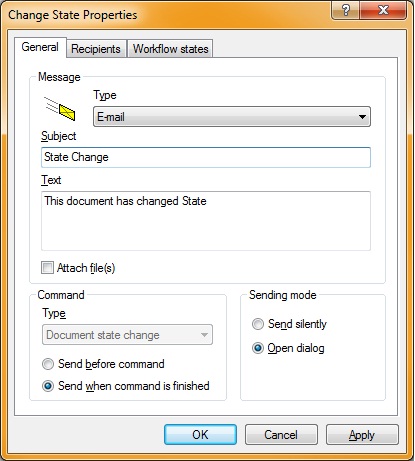
Figure 2
The Messaging Agents will now be enabled and notifications will be sent when documents go through a State Change as specified by the agent. It is important to remember that every associated document, when going through a state change, will trigger a notification and if a user changes the State of multiple documents, notifications will be sent for each individual document that undergoes a state change.