ProjectWise V8i SELECTseries 3 Enhancements - User and Group Management from the ProjectWise Explorer
In previous articles, we discussed some of the security related enhancements in ProjectWise V8i SELECTseries3 including the Access Control Tab and the Restricted Administrators Group. In this month’s article, we’ll take a look at the Group Management feature which allows users to manage group memberships directly in the ProjectWise Explorer. This allows ProjectWise Administrators to delegate group membership management to non-administrative users without giving them access to all of the functionality of the ProjectWise Administrator application.
In order for a user to be able to administer group membership from the ProjectWise Explorer, they must be designated as a Group Owner. This can be done in the Group Properties dialog within the ProjectWise Administrator where you will notice the addition of an Owners tab. Users who are in the Owners list are allowed to manage the membership of that group from the ProjectWise Explorer.
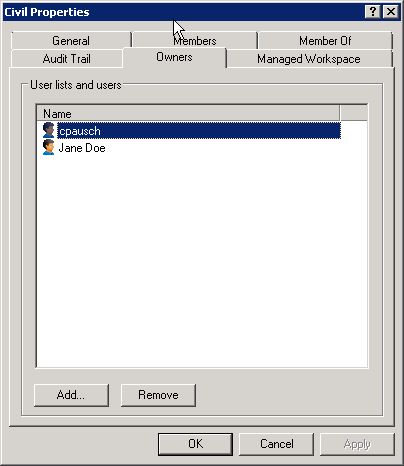
Figure 1
The User/Group Management tool can then be launched from the ProjectWise Explorer by going to Tools > User Management. In this dialog box, you will notice three columns. The first column displays a listing of all of the Users and Groups in the current datasource. The second column displays the Users available to be added to the currently selected Group and the third column displays those users who are members of the currently selected group. Fields are available at the top of each column allowing you to narrow down the list of users by using filters on the user name, description, or their domain membership. This can make the list more manageable when dealing with large datasources. If the current user is not an Owner of the currently selected group, the message “Current user has no access to the list” will be displayed in the Available and Assigned columns.
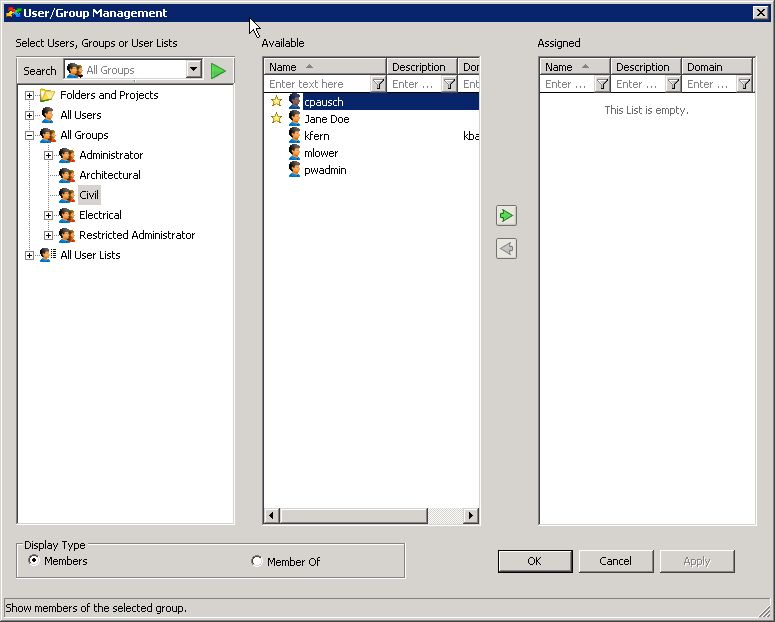
Figure 2
Adding a user to a group is simply a matter of selecting the user in the available user column and double clicking the user name to move them into the assigned column. Double clicking the user name when it is in the assigned column has the effect of removing the user from the group. Arrow buttons are also located between the Available and Assigned columns that can be used to add/remove users from groups.
You will also notice that group owners are listed with a star next to their name. You can add or remove group owners by right-clicking on the user name and selecting either the Set Owner or Remove Owner command.